Although these have a minimal user interface, they are still standard applications in the way they are built, the way they are started, and what access they have to the system. For example, they start when the user logs in and have the privileges of the current user, and each user has to start their own instance of the application.
Sometimes it is desirable to have software that starts before any user logs into the system – IIS starts when the machine starts and serves web pages quite happily with no user logged in. IIS is also a perfect example of an application to which we don’t want to give any more privilege than strictly necessary since it has a public face. It must also listen on a specific port, so it doesn’t make sense to have multiple instances.
IIS is an example of a Windows Service application, which differ from normal applications in a number of ways:
- They have no user interface of their own
- They run in the context of specified account, rather than that of the logged-in user
- They can start before any user logs into the system.
- There can only be a single instance of a service on a machine
- They must be installed on a system before they can execute
Truly invisible?
Services have no user interface of their own, and are thus truly “Invisible Applications”. However, many services require a UI in order to allow the user to configure their operation, even though the task that they perform requires them to be installed as a service.An example of this is virus scanning software. The core scanning operations are almost always under the control of a Windows Service because an ordinary user cannot be allowed the level of privilege required by a virus scanner to install its filters and device drivers. On the other hand, most virus scanners have a sophisticated user interface, with a system tray icon, configuration screens and outbreak notification.
This is accomplished by the combination of Windows Service and a separate controller application, which is a lightweight application that simply provides the user interface. The controller will usually have a system tray icon, and follow the pattern of application development shown in my previous article. This service/controller model is widely used in the Windows operating system, as well as by many third party applications.
Creating a trivial Service
Visual Studio has a built-in project type for Windows Services, so the first step is to create a new project of this type – I’ve created mine in C# and called it “TrivialService”. If I open TrivialService.cs Visual Studio shows me the component designer view – right-click on the canvas and select “View Code” to see the source code.This file contains a single class that inherits from the .NET ServiceBase class. This base class provides much of the functionality needed to implement a service, in the same way that the Form class provides most of the functionality needed for a window.
The first thing to note is the Main function. In a standard Windows application the Main function starts the application – a Windows Forms application just calls Application.Run, specifying the form that should be used as the main window. If it is a console application, the Main function contains all of the functionality of the application directly or indirectly.
Our Windows Service instead creates a list of the services in this executable (in this case just the one) and passes it to ServiceBase.Run:
ServicesToRun = new
	System.ServiceProcess.ServiceBase[]
	{ new TrivialService() };
System.ServiceProcess.
	ServiceBase.Run(ServicesToRun);
This is followed by an InitializeComponent method, that sets the name of the service:
this.ServiceName = “TrivialService”Finally, at the bottom of the class you will see OnStart and OnStop handlers – more on these shortly.
Installing a Service
Having created a valid (if not particularly useful) Windows Service, the next thing to do is to install it. This requires a number of different registry entries to be made to configure the service and enable the system to enumerate it. .NET makes this straightforward too, by providing a command line tool called InstallUtil that will install the service for us as long as the executable includes a service installer class. To add a service installer, open TrivialService.cs and right-click on the canvas. Select the “Add Installer” option, and a new component called ProjectInstaller will be created, with two components on its canvas.ProjectInstaller inherits from Installer which is the base class for all custom installation components in .NET. The first component it contains is of type ServiceProcessInstaller, which also inherits from Installer (indirectly by inheriting from ComponentInstaller). This class specialises in installing Windows Service executables, and its properties specify which account should be used to run the service. Set this to LocalSystem for now.
The second component is a ServiceInstaller that actually installs the registry entries for the service. A single executable can contain multiple services, and thus we could have multiple ServiceInstaller instances, one for each service. Build the project once more, and open a Visual Studio Command Prompt from the Start Menu. Navigate to the project “bin\Debug” directory, and type the following command:
InstallUtil TrivialService.exeYou should see several lines of status output from the installation process, finishing with:
The transacted install has completed.To uninstall the service, you use exactly the same command, just adding the “/u” flag.
Windows Installer also supports the installation of Windows Services using the same installation helper interfaces as are used by InstallUtil. This enables you to use the same installation method in your final software releases, without having to direct a user to run InstallUtil manually.
The final installation of a service should always choose an appropriate account for running the service. It may be appropriate to create a new account that has just the necessary permissions and no more, but this table shows some of the options:
Table 1: Accounts for Services |
|
| Account | Comments |
| LocalSystem | Highly privileged account used to run services on older OS versions, its use is deprecated in favour of LocalService or NetworkService |
| LocalService | Acts as a non-privileged user on the local system, connects to network anonymously. Only available on XP and Server 2003. |
| NetworkService | Acts as a non-privileged user on the local system, connects to network using machine credentials. Only available on XP and Server 2003. |
| User Account | Can be configured with just the privileges the service actually needs |
Services should also indicate which other services they depend on. For example, if you use WMI within your service, you should indicate this to ensure that the Service Control Manager does not load your service before the WMI service, causing your service to fail.
Services may run either in the own process, or be hosted inside a SvcHost process created by the system. This saves the overhead of having an additional process, and there should be no penalty for a well-behaved service in doing this, although any failure can potentially bring down all the services in the process. By default, .NET services are installed in their own process, and the installer classes do not support changing this.
The lifecycle of a Service
A Windows Service exists in one of three main states, as follows:- Stopped – the Service is installed but not active
- Running – the Service is running
- Paused – the Service is still loaded but is currently idle
Table 2: State Transitions |
||
| State Transition | Function | State While Executing |
| Stopped ? Running | OnStart | StartPending |
| Running ? Stopped | OnStop | StopPending |
| Paused ? Stopped | OnStop | StopPending |
| Running ? Paused | OnPause | PausePending |
| Paused ? Running | OnContinue | ContinuePending |
Note that while a service is executing one of these state transitions, it will appear to the outside world to be in one of 4 additional XxxPending states.
There are two ways of managing services built into the Windows OS. Perhaps the most obvious is the “Services”utility (actually a Microsoft Management Console snap-in) located in the “Administrative Tools” section of the Control Panel, as shown in Figure 1.
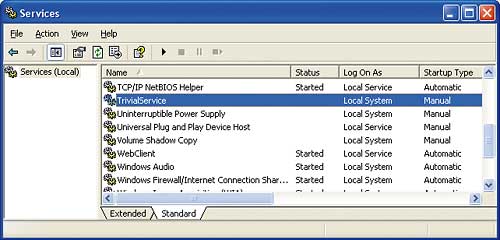
Figure 1: Services in the Control Panel
Right-clicking a service gives options for changing the service state, or by selecting “Properties” you can explore the installation attributes of a service, as well as to administer the service settings.
The other way of controlling services is using the command line:
Table 3: Controlling a Service from the Command Line |
|
| Command | Function |
| NET START serviceName | Start a service |
| NET STOP serviceName | Stop a service |
| NET PAUSE serviceName | Pause a service |
| NET CONTINUE serviceName | Continue a paused service |
| NET START | Lists running services |
| SC START serviceName | Start a service |
| SC STOP serviceName | Stop a service |
| SC PAUSE serviceName | Pause a service |
| SC CONTINUE serviceName | Continue a paused service |
| SC QUERY | Status of all installed services |
| SC QUERY serviceName | Status of a specific service |
| SC | Shows all options for the SC command |
The SC command supports more advanced functionality and is available in Windows XP and Server 2003, or in the separate resource kit for Windows 2000. The NET command is always available.
Customising the ServiceBase Class
The service we created with Visual Studio only contains OnStart and OnStop handlers, but we can easily add OnPause and OnContinue handlers using the Class Viewer in Visual Studio. Select the service class, and expand the tree at “Bases and Interfaces” and then at “ServiceBase”. Right-click on OnPause or OnContinue and select “Add” from the menu, then select the “Override” option.You will see that ServiceBase also has other OnXxx handlers that can be overridden, including:
- OnCustomCommand – Called when a custom command is sent to the service
- OnPowerEvent – Called when the power state of the system is changing (e.g. to suspend or hibernate)
- OnShutdown – Called when the system is shutting down
- CanPauseAndContinue – set if your service can handle OnPause and OnContinue notifications.
- CanStop – clear if your service is not able to stop once started
- CanShutdown – set if your service should receive the OnShutdown notification
- CanHandlePowerEvent – set if your service should receive the OnPowerEvent notification
- AutoLog – clear to disable automatic event log entries when the service starts and stops
Interacting with the desktop
Although services don’t have a user interface of their own, we have already looked at how it is possible to interact with services through the command line and through the control panel to send simple commands to change the state of the service.There are a number of other basic mechanisms for interaction between the desktop and the service built into the Windows Services architecture.
If a service needs to receive configuration information, it is possible to specify this as start parameters, which can be edited in the Control Panel and are received as an array of strings in the OnStart function (much as command line parameters are with a Main function).
A service can report its status through the Windows Event Log, which can be viewed through the Event Log Viewer in the Administrative Tools section of the Control Panel. This is usually accomplished using the EventLog member of ServiceBase to write messages, e.g.:
EventLog.WriteEntry(
	“An event happened.” );
It is possible to read the Event Log programmatically using the EventLog class, and to send commands and startup parameters programmatically, using the .NET ServiceController class. The ServiceController class can also query the service state, and wait for state changes.
The ExecuteCommand method of the ServiceController class additionally allows you to send custom commands to a service. These commands are assigned an integer identifier in the range 128–256. They don’t take any parameters or have any return values, so they are limited to instructing the service to perform an operation in “fire and forget” fashion.
I have stated several times that services do not have their own user interface. In fact, it is possible for a service to interact with the desktop using MessageBox.Show, with MessageBoxOptions.ServiceNotification. This is OK for very simple user notification and interaction, but you must bear in mind that there may be no user present, and that this message box will appear even if no user is logged in. Also, only a single service notification can be active at a time – multiple requests are queued.
It is technically possible for a service to have full Windows Forms UI components if it is installed with the “AllowServiceToInteractWithDesktop” permission. However, this tends to compromise the security of the system, and is beyond the scope of this article.
Communicating with a Service
Having established that the options for interacting with a service through a desktop user interface are pretty limited, how can we communicate with a service? In fact, pretty much any mechanism that we would use to communicate between processes or machines can be used to communicate with services.Basic communication may use the filesystem or registry to carry out more complex configuration of services than the start parameters readily allow. A separate configuration tool updates the file or registry then sends a custom command to the service to tell it to read its new settings. If the tool needs to know when things happen within the service (e.g. the configuration is complete, or the service has provided some output in a file, then named events (and other synchronisation objects) can be used. Note that support for named events appears in the new .NET 2.0 EventWaitHandle class, but is not available in earlier versions of the framework without using P/Invoke.
If more than one process or user needs to access the service simultaneously, named pipes offer a simple solution for binary transfer of data, although .NET doesn’t support named pipes, preferring to use sockets.
Sockets also offer a simple solution for binary communications between processes, and between machines too. They are one of the most flexible means of communicating with a service, whether through a well-known public protocol (like HTTP/HTML) or a completely application-specific protocol. I mentioned IIS earlier as an example of a Windows Service – it is also an example of a service that uses sockets for communication, listening for web page (and web service) requests on port 80.
For some applications it is important that the communications have a greater degree of reliability than a raw sockets interface can offer. In this case, Microsoft Message Queue (MSMQ) may offer a solution with its guaranteed message delivery capability.
One thing that all of these techniques have in common is that they are not inherently type-safe. They allow the transfer of data between processes, but it is up to the user to structure and serialise that data.
One means of communication that does offer type safety is .NET Remoting. Of course, remoting uses a binary mechanism for its underlying communications, but the .NET environment hides most of this detail from you. There is an interesting symbiosis here. Remoting is a good way of interfacing to Windows Services. Windows Services are a good way of hosting remote objects!
It is beyond the scope of this article to go into all the details of remoting – whole shelves of books have been written on the subject. What I will demonstrate here, however, is how to use remoting in a type-safe implementation of the service/controller model.
An example Service
In order to demonstrate implementation of a service and controller using remoting to communicate, I will provide a simple solution to a common security problem. In corporate environments, it used to be common to specify PCs without a floppy disk drive to prevent users from introducing viruses and illegal software into the system, and stealing data from it. Over the last few years high capacity USB flash memory devices, portable hard drives, and even personal music players have given users a new way of connecting storage to systems, through the USB port. Often, disabling USB ports is just not an option, as they may be used legitimately for mice, keyboards and other peripherals, so the next best thing is to log the connection of storage devices for review by the IT department.The Windows Service will use WMI to detect the addition of storage devices, and to capture which users are logged on to the system at the time. This information will then be stored in the Event Log, which can be accessed locally or remotely as required by administrators. The service will also provide a remote object to read and change settings such as whether a warning message should be displayed to the user when they connect a storage device. These settings will be stored in Isolated Storage.
The controller application is a simple console application that allows an administrator to access the settings of the service. Since our application uses remoting for its connectivity, it will inherently support remote access (subject to network and firewall restrictions!).
Service and controller implementation
The listing below shows a very simple class that carries the settings information needed for this service, i.e. whether a message should be displayed to the user, and if so what the text is. Note that it is marked Serialisable to indicate that it can safely be serialised across a remoting connection.namespace LogFlashSettings {
[Serializable()]
public class LogFlashSettings {
public string WarningMessage = “”;
public bool WarningMessageEnabled =
false;
public LogFlashSettings() {}
public LogFlashSettings(bool Enabled,
string Message) {
WarningMessageEnabled = Enabled;
WarningMessage = Message;
}
}
}
The listing below shows code that uses XML Serialisation to and from Isolated Storage to persist the settings. This code will always be invoked on the server via remoting.
public class LogFlashSettingsManager:MarshalByRefObject {
	const string SettingsFileName = “LogFlashSettings.xml”;
	public void WriteSettings(LogFlashSettings settings) {
		XmlSerializer serialiser = new XmlSerializer(typeof(
			LogFlashSettings));
		IsolatedStorageFileStream fileStream = new
			IsolatedStorageFileStream(SettingsFileName,
			FileMode.Create, FileAccess.Write, FileShare.None);
		StreamWriter writer = new StreamWriter(fileStream);
		serialiser.Serialize(writer, settings);
		writer.Close();
	}
	public void ReadSettings(out LogFlashSettings settings) {
		try {
			XmlSerializer deSerialiser = new XmlSerializer(
				typeof(LogFlashSettings));
			IsolatedStorageFileStream fileStream = new
				IsolatedStorageFileStream(SettingsFileName,
				FileMode.Open, FileAccess.Read, FileShare.None);
			StreamReader reader = new StreamReader(fileStream);
			settings = (LogFlashSettings)
				deSerialiser.Deserialize(reader);
			reader.Close();
		} catch {
			settings = new LogFlashSettings();
		}
	}
}
Services wishing to host a remote object must first create a channel – in this case a TCP channel specifying a port number – and register the channel with the framework through a call to ChannelServices.RegisterChannel. The final step is to register that you intend to host a “well-known” service, making a call to RemotingConfiguration.RegisterWellKnownServiceType. This call takes as parameters:
- The type to be hosted
- The URI to be used to access the type
- The activation mode of the object, which can either be Singleton (only one instance of the object is ever created) or SingleCall which means that a new object instance is used for each call.
tcp://localhost:1559/
LogFlashSettings.LogFlashSettingsManager
To keep the remoting code tidy I have packaged it up into static functions in a helper class called LogFlashRemoting:
public class LogFlashRemoting {
	private const int ChannelNo = 1559;
	public static void HostLogFlashSettingsManager() {
		TcpChannel chan = new TcpChannel(ChannelNo); //open a channel
		ChannelServices.RegisterChannel(chan);
		RemotingConfiguration.RegisterWellKnownServiceType(typeof(
			LogFlashSettingsManager), “LogFlashSettings.LogFlashSettingsManager”,
			WellKnownObjectMode.Singleton);
	}
	public static LogFlashSettingsManager GetLogFlashSettingsManager(
		string Host) {
		return (LogFlashSettingsManager) Activator.GetObject(typeof(
			LogFlashSettingsManager), “tcp://” + Host + “:” + ChannelNo +
			“/LogFlashSettings.LogFlashSettingsManager” );
	}
}
The mechanisms used for this example demonstrate how to configure remoting programmatically. The .NET framework supports putting most remoting configuration information in the app.config file as an alternative.
The service implementation centres around the OnStart handler. This enables hosting of the settings manager class for remoting, and then creates a ManagementEventWatcher to watch for the connection of new disk drives using WMI. When a WMI event is received, we use WMI to retrieve the names of the users associated with active instances of explorer.exe. Since each logged-in user will have at least one explorer.exe instance hosting the start menu and explorer bar, this is a simple way of testing for active users. This is:
private ManagementEventWatcher DiskConnectedWatcher = null;
protected override void OnStart(string[] args) {
	LogFlashRemoting.HostLogFlashSettingsManager();
	if (DiskConnectedWatcher == null) {
		WqlEventQuery wmiQuery = new WqlEventQuery(“SELECT * FROM
			__InstanceCreationEvent WITHIN 10 WHERE TargetInstance ISA
			\”Win32_LogicalDisk\””);
		DiskConnectedWatcher = new ManagementEventWatcher(wmiQuery);
		DiskConnectedWatcher.EventArrived +=new EventArrivedEventHandler(
			DiskConnectedWatcher_EventArrived);
	}
	DiskConnectedWatcher.Start();
}
protected override void OnStop() {
	if (DiskConnectedWatcher != null) {
		DiskConnectedWatcher.Stop();
		DiskConnectedWatcher.Dispose();
		DiskConnectedWatcher = null;
	}
}
private void DiskConnectedWatcher_EventArrived(object sender,
	EventArrivedEventArgs e) {
	StringBuilder eventMessage = new StringBuilder();
	ROOT.CIMV2.LogicalDisk wmiDisk = new ROOT.CIMV2.LogicalDisk(
		(ManagementBaseObject) e.NewEvent[“TargetInstance”]);
	eventMessage.Append(“New Disk Detected: “ + wmiDisk + “\n” );
	eventMessage.Append( “Disk is “ + wmiDisk.Size + “ bytes with “ +
		wmiDisk.FreeSpace + “ bytes free\n” );
	eventMessage.Append(“Users currently logged in:\n” );
	ROOT.CIMV2.Process.ProcessCollection explorerProcesses =
		ROOT.CIMV2.Process.GetInstances(“Caption=\”explorer.exe\”” );
	foreach (ROOT.CIMV2.Process wmiProcess in explorerProcesses) {
		string domain,user;
		wmiProcess.GetOwner(out domain,out user);
		eventMessage.Append( “ “ + domain + “\\” + user + “ \n” );
	}
	EventLog.WriteEntry( eventMessage.ToString() );
	LogFlashSettingsManager sm = new LogFlashSettingsManager();
	LogFlashSettings.LogFlashSettings s;
	sm.ReadSettings(out s);
	if(s.WarningMessageEnabled) {
		MessageBox.Show(s.WarningMessage, “Warning!”, MessageBoxButtons.OK,
			MessageBoxIcon.Stop, MessageBoxDefaultButton.Button1,
			MessageBoxOptions.ServiceNotification);
	}
}
Once the necessary information has been collected, we make an entry in the Event Log, then read the settings to see if a warning message should be displayed to the user.
Finally, the implementation of the service controller console application is:
static void Main(string[] args) {
	if ((args.Length == 2) && (args[0] == “show”)) {
		LogFlashSettings.LogFlashSettings s;
		LogFlashSettingsManager mgr = LogFlashRemoting.
			GetLogFlashSettingsManager(args[1]);
		mgr.ReadSettings(out s);
		Console.WriteLine(“Settings for host \”” +
			 args[1] + “\”: “);
		Console.WriteLine( “WarningMessageEnabled: “
		 + s.WarningMessageEnabled );
		Console.WriteLine( “WarningMessage: “
			+ s.WarningMessage );
	} else if ((args.Length == 3) && (args[0] == “set”)
		&& (args[2] == “off”)) {
		LogFlashSettingsManager mgr = LogFlashRemoting.
			GetLogFlashSettingsManager(args[1]);
		mgr.WriteSettings(new
			LogFlashSettings.LogFlashSettings(false , “”));
		Console.WriteLine(“Settings for host \””
			+ args[1] + “\”: “);
		Console.WriteLine(“Warning Message Disabled”);
	} else if ((args.Length == 4) && (args[0] == “set”) &&
		(args[2] == “on”)) {
		LogFlashSettingsManager mgr = LogFlashRemoting.
			GetLogFlashSettingsManager(args[1]);
		mgr.WriteSettings(new
			LogFlashSettings.LogFlashSettings(true, args[3]));
		Console.WriteLine(“Settings for host \””
			+ args[1] + “\”: “);
		Console.WriteLine(“Warning Message Enabled:”
			+ args[3]);
	} else {
		Console.WriteLine(“Usage: “);
		Console.WriteLine(“LogFlashCtl show host”);
		Console.WriteLine(“ or “);
		Console.WriteLine(“LogFlashCtl set host off” );
		Console.WriteLine(“ or “);
		Console.WriteLine(“LogFlashCtl set host on \”
			Message Text\””);
	}
}
To retrieve settings (including the defaults) from the service, use the command:
LogFlashController show localhost…and to change settings:
LogFlashController set localhost off
LogFlashController set
	localhost on “Warning, flash disk
		usage logged!”
Debugging a Service
Services have to be installed and started in order to execute – which means they can’t be started in the debugger like normal applications. Instead, you must attach to the process once it has already been started by the Service Control Manager. This can be accomplished using the “Processes…” option on the Debug menu in Visual Studio. Once attached, you can set breakpoints in the usual way.Using this method you can’t debug a service until it has started – which means that debugging the OnStart routine is usually best accomplished by making Event Log entries to indicate progress. If OnStart carries out a lot of complex operations then there are two options to debug this code.
The first is to move all of the code from OnStart into a custom command handler. In this way, you can start the service then attach the debugger and set breakpoints in the code to be debugged. You then send the custom command to your service (create a simple application to do this) and you can debug as usual.
There are some operations that may behave differently in a custom command handler than they do in the OnStart routine, in which case debugging the OnStart routine itself is required. The only way to achieve this is to create a second service (with no implementation, much like the TrivialService example above) in the same executable, so they will share the same process. By loading the dummy service, the executable is loaded into memory and the process created. You can then attach the debugger and create a breakpoint in OnStart before starting the service you wish to debug.
Conclusions
The example implementation ignores many important security and optimisation issues, as well as the fact that the problem could be solved in other ways. However, it demonstrates all of the principles involved in developing a Windows Service and a corresponding controller application, and as such provides an introduction to a technology that is sometimes considered a black art, even by experienced Windows developers. The source code for the example application is available to download.Ian Stevenson has been developing Windows software professionally for ten years, in areas ranging from WDM device drivers through to rapid-prototyping of enterprise systems. Ian currently works as a consultant in the software industry, and can be contacted at [email protected].
Comments