Ed: Following on from our look at the four main pieces of Windows Azure in “Introduction to Windows Azure”, John Mannix runs us through the development of an Azure application in C# and its deployment into the cloud. He briefly looks at
- the basic Visual Studio Azure project template
- some Azure development common code
- how to use the Azure Management Portal to ready your space in the cloud for your application
- deploying the application
To follow this tutorial, you’ll need to download and install the Windows Azure SDK and Windows Azure Tools for Visual Studio. You can either download and install them separately or install them using Microsoft’s Web Platform Installer, which is the preferred method. Go to http://www.microsoft.com/windowsazure/sdk/ to begin either procedure.
The Visual Studio Azure Project Template
Once you’ve installed the Azure tools for Visual Studio, open Visual Studio and click File > New Project. Under the list of Installed Templates, you’ll find a new Cloud section listed for both Visual Basic and Visual C#. Both contain just one new template, called Windows Azure Project.

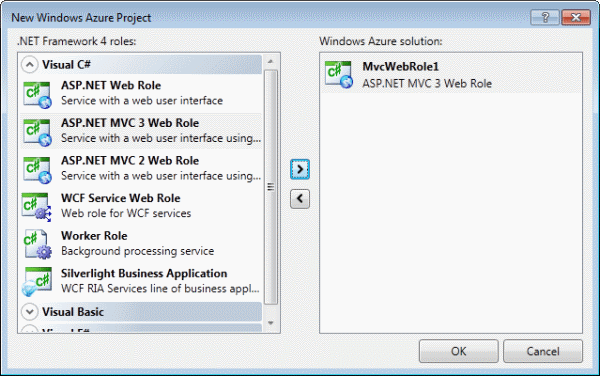
Select the Visual C# version of the project and click OK. Creating a new project with this template brings up the New Windows Azure Project dialog, which is where you add roles to your project. Your project can host multiple roles, and each role maps to a web application, a web service or a background process. You add roles by clicking on the right arrow with the role on the left selected, and then you can rename the role in the right hand pane. For the purposes of this article, we will create an MVC3 Web Role. Select and add this role to solution and click OK.
Finally, because we have chose to create an ASP.NET MVC3 project, the New ASP.NET MVC 3 Project dialog appears so we can set a few basic options before its construction. For the purposes of this tutorial, leave everything at their defaults and click OK.

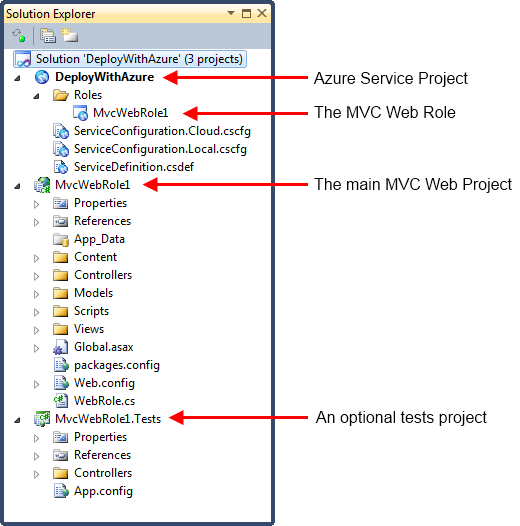
Once Visual Studio has finished generating all the project files, have a look in Solution Explorer. You’ll see that it has generated three projects.
- The first project is for the service, and contains the configuration information for the project and its roles.
- The second project is the web role itself and contains a default MVC application with all the files you need to get started.
- The optional third project contains the standard MVC unit tests.
Setting up your Local Development Storage Database
The difference between running a web app in Azure and running it on a conventional server is in the services that are available to you. An obvious example is that in Azure you can’t write to the local file system because there isn’t one! Instead you have to take advantage of the Windows Azure Storage Services. Specifically, there is a service called the Blob Service which behaves in a similar way to a file system.
For debugging purposes, Azure projects emulate these services locally using a database to emulate the cloud. By default, the emulator is setup to use the default instance of SQL Server Express called SQLExpress. If you’re not using the default instance of SQLExpress, you’ll need to let the storage emulator know this.
- Select Start > All Programs > Windows Azure SDK v1.4 > Windows Azure SDK Command Prompt
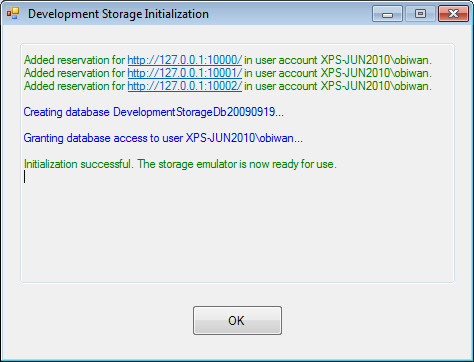
- Type dsinit /sqlinstance:INSTANCE_NAME and press Enter. Note that INSTANCE_NAME should be a period (.) if you’re using the unnamed default instance.
You’ll see the following dialog.
Run and Debug As Administrator
If you run the default cloud service out of the box, by pressing F5 in Visual Studio, you should see the default MVC web UI open in a browser. However, if you typically run Visual Studio as a standard user rather than an administrator, you’ll see the following dialog. Much in the same way that you must run Visual Studio as an administrator to debug web applications running on IIS, so too must you run Visual Studio as an administrator to debug and run Azure applications locally in the emulator installed with your Visual Studio Azure Tools.

Some Common Development Code
So now we have the default MVC 3 Web Application running inside the Azure Storage emulator, let’s look at some common code.
To begin, we’ll add some code to global.asax.cs to tell the application how to handle configuration changes in the role environment. This needs to be done before you can access configuration settings for the role. You’ll need to add the Azure namespaces to the top of the file to begin with.
using Microsoft.WindowsAzure;
using Microsoft.WindowsAzure.ServiceRuntime;
That done, the following new code should be added at the end of the Application_Start() method.
// This code sets up a handler to update CloudStorageAccount instances when their corresponding
// configuration settings change in the service configuration file.
CloudStorageAccount.SetConfigurationSettingPublisher((configName, configSetter) =>
{
    // Provide the configSetter with the initial value
    configSetter(RoleEnvironment.GetConfigurationSettingValue(configName));

    RoleEnvironment.Changed += (sender, arg) =>
    {
        if (arg.Changes.OfType<RoleEnvironmentConfigurationSettingChange>()
            .Any((change) => (change.ConfigurationSettingName == configName)))
        {
            // The corresponding configuration setting has changed, propagate the value
            if (!configSetter(RoleEnvironment.GetConfigurationSettingValue(configName)))
            {
                // In this case, the change to the storage account credentials in the
                // service configuration is significant enough that the role needs to be
                // recycled in order to use the latest settings. (for example, the
                // endpoint has changed)
                RoleEnvironment.RequestRecycle();
            }
        }
    };
});
Writing Files to the Blob Service
We mentioned earlier that Azure includes a service called the Blob Service which behaves in a similar way to a file system. Our second code example demonstrates how to go about writing files to the blob service. The first thing you need is a connection string for the blob service.
- Open Solution Explorer
- Expand the Roles folder under the Azure Project so you can see the entry for the ASP.NET MVC 3 Role you created earlier and right click it.
- Select Properties to view the Role’s properties dialog.
- Click the Settings tab.
You’ll see one setting already exists called Microsoft.WindowsAzure.Plugins. Diagnostics.ConnectionString. This is the connection string used for diagnostic logging, and it is initially set to use development storage, which is an implementation of the storage service that runs on your machine for testing and debugging purposes.
We need to add an additional connection string that will be used for writing our blob data to storage.
- Click Add Setting.
- Change the setting name from Setting1 to DataConnectionString.
- Change the setting type from String to Connection String.
- Set the value to UseDevelopmentStorage=true.
- Hit Ctrl+S to save the new setting.
Later on we will change this to point to a live storage account so that we can make the blob files we write publically available.
For the purpose of creating a simple example, we are going to add a file upload field to the home page of our default application so that we have something to write to blob storage. So change the Home/Index.aspx view to look like this:
<asp:Content ID="Content2" ContentPlaceHolderID="MainContent" runat="server">
    <% Html.BeginForm("UploadFile", "Home", FormMethod.Post, new { enctype = "multipart/form-data" }); %>
    <h2><%: ViewData["Message"] %></h2>
    <% if (ViewData["FileUri"] != null) { %>
        <a href="<%=ViewData["FileUri"]%>"><%=ViewData["FileUri"]%></a>
    <% } %>
    <p>
        To learn more about ASP.NET MVC visit <a href="http://asp.net/mvc" title="ASP.NET MVC Website">http://asp.net/mvc</a>.
    </p>
    <p>
        <label for="uploadedFile">Upload file</label> <input type="file" name="uploadedFile"/>
    </p>
    <p>
        <input type="submit" value="Submit" />
    </p>
    <% Html.EndForm(); %>
</asp:Content>
We have added an opening form tag with encoding type set to multipart/form-data, which is required to allow us to include a file upload field. We have also added a simple file upload field called uploadedFile, and of course we have a closing form tag.
The form posts back to a controller method called UploadFile, so let’s have a look at the implementation of that.
[HttpPost]
public ActionResult UploadFile(HttpPostedFileBase uploadedFile)
{
    try
    {
        // #1 Setup the connection to Windows Azure Storage
        var storageAccount = CloudStorageAccount.FromConfigurationSetting("DataConnectionString");
        var _BlobClient = storageAccount.CreateCloudBlobClient();

        // #2 Get and create the container
        var _BlobContainer = _BlobClient.GetContainerReference("uploadedfiles");
        _BlobContainer.CreateIfNotExist();

        // #3 Setup the permissions on the container to be public
        var permissions = new BlobContainerPermissions();
        permissions.PublicAccess = BlobContainerPublicAccessType.Container;
        _BlobContainer.SetPermissions(permissions);

        // #4 Write the uploaded file to blob storage
        var blob = _BlobContainer.GetBlobReference(uploadedFile.FileName);
        blob.UploadFromStream(uploadedFile.InputStream);
        blob.Properties.ContentType = uploadedFile.ContentType;
        blob.SetProperties();

        ViewData["Message"] = "Your file has been uploaded to blob storage";
        ViewData["FileUri"] = blob.Uri;
    }
    catch (Exception)
    {
        ViewData["Message"] = "There was a problem uploading your file";
    }

    return View("Index  ");
}
Again, you also need to import the following namespaces at the top of the file:
using Microsoft.WindowsAzure;
using Microsoft.WindowsAzure.StorageClient;
This code actually writes the file to blob storage, and shows how you use the Windows Azure storage services in practice. Section #1 gets the connection string setting from the service configuration file. Section #2 ensures that the container for the uploaded files exists with a call to CreateIfNotExist(). Section #3 sets up permissions on the container to make sure our uploaded files will have a public Uri. And section #4 writes the file to blob storage with blob.UploadFromStream. It is easy enough to set the filename and content type on the blob file to the same as the uploaded file, and we finish off by setting the permissions on the file to make it public.
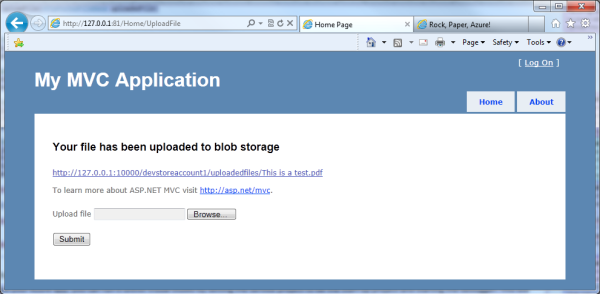
In this simple example, all we’re doing is updating the message on the home page to show that the blob file has been created and outputing the the file’s public Uri to show that it can be downloaded from blob storage.
This is a trivial example, and in practice you would normally have several layers of abstraction between the UI and the Blob Storage API e.g. a service layer, repository and models, but it serves to demonstrate some of the differences between working with Azure and a conventionally hosted application.
Once you have coded your Azure app, you can run it within Visual Studio by setting the service project to be the start up project and starting the debugger (Press F5). This will fire up the Computer Emulator and Storage Emulator services, which implement the Azure services such as blob storage on your local machine for you to test. You should be able to upload a file and then download it again from the Uri output to the home page:
Deploying Your Application To The Cloud
So far we have built a simple MVC application that makes use of one of Azure’s services to upload a file to blob storage and make it available on a public Uri. Now we come to the main theme of this article – deploying your Azure service to the cloud.
The first step is to set up a Windows Azure account from the Windows Azure website – you can register for a free trial at http://www.microsoft.com/windowsazure/free-trial/default.aspx or purchase a subscription depending on your needs at http://www.microsoft.com/windowsazure/..Note that a credit card is required for sign up, even for a free trial account, because if your usage exceeds the free limits you are charged at the standard rate to your card. Details of the monthly allocations are on the free trial sign up page (expand the monthly allocations link). Also, MSDN subscribers get free Azure usage time as part of the MSDN subscription, so if you have an MSDN subscription check out the Azure platform benefits for MSDN subscribers here http://msdn.microsoft.com/en-gb/subscriptions/ee461076.aspx.
Once you’ve set up an account you can sign into the management portal at http://windows.azure.com , which is where you manage your accounts and applications.
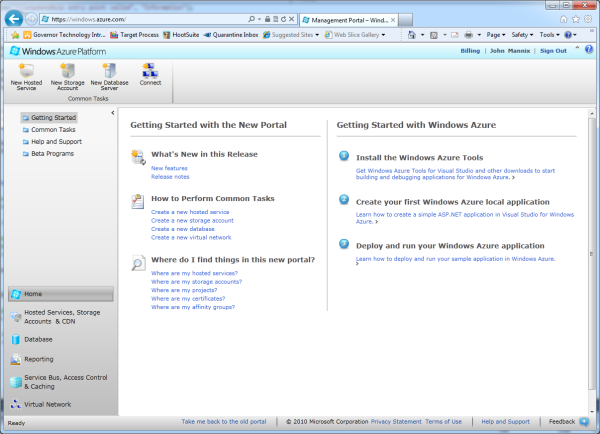
The first thing to do is create a storage account to host the files written by the application. Click on Hosting Services, Storage Accounts & CDN in the lower left hand menu then click on Storage Accounts in the upper left hand menu.

To create a new storage account click on the New Storage Account icon in the toolbar, which will open up the Create a New Storage Account dialog box.
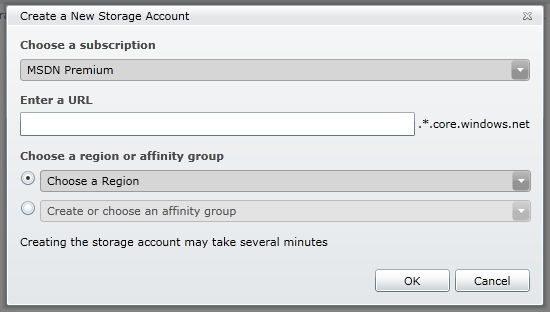
Type a prefix for the URL and select a region for your storage account – the prefix will have to be something that isn’t already taken.
The next step, once the account is created, is to change the settings of your role to point to the new storage account. Opening the settings tab for the role as you did earlier and clicking the … button next to the data connection string. This brings up the Storage Account Connection String dialog box where you type the account name (URL prefix) of your storage account and paste in the account key, which you can copy from the management portal. Your application will now write to your live storage account instead of local developer storage.
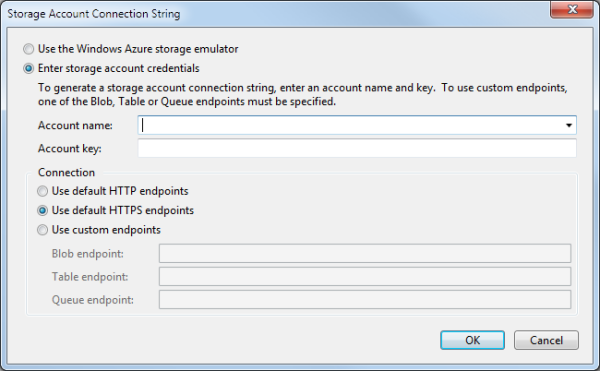
You would normally test your app running locally and writing to the live blob storage account as a last check to make sure you have the configuration correct before you go live.
The final step in publishing the app is to publish the app itself so that it is hosted by Windows Azure. This is done by right clicking the cloud service project and selecting Publish from the menu. This brings up the Publish Cloud Service dialog box:
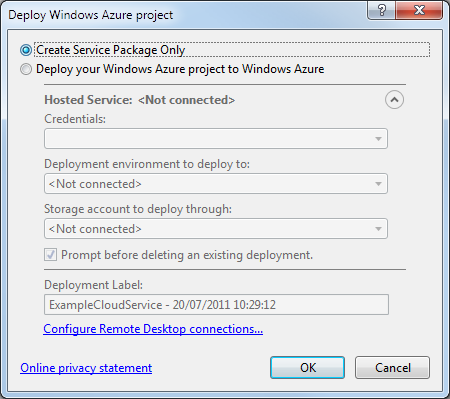
Because this is the first time you are deploying the application, you need to select the option to Create Service Package Only. This will create the deployment package but won’t actually upload it to Azure. Instead an explorer window will open containing the files that you will need later when you create the new hosted service in the Azure management portal.
You then create a new hosted service in Azure by clicking on Hosted Services in the left hand menu of the management portal and then clicking the New Hosted Service icon in the toolbar. This brings up the Create a New Hosted Service dialog:
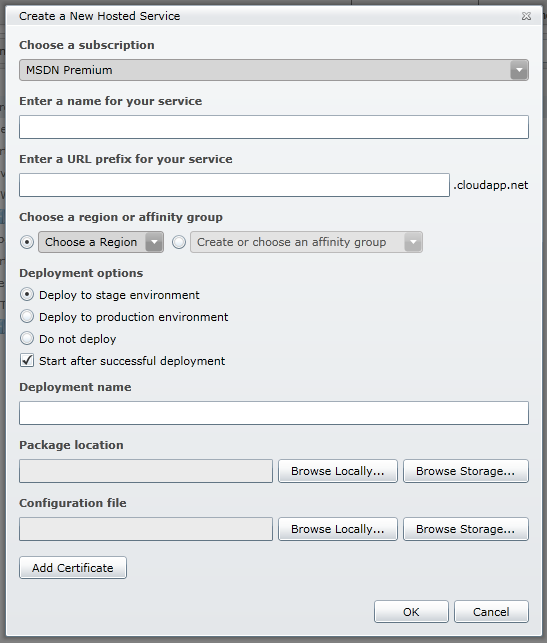
Enter a name and a unique URL prefix for your service – for a web application this will be the URL you use to access the application. Then choose the region you want your service to run under, enter a deployment name and upload the package files you created in Visual Studio. You should then see your hosted service being created in the management portal. If you checked the box to start after successful deployment then the new service will start automatically, and that is all there is to it!
There are two environments for each hosted service – the production environment and the staging environment. Applications published to the production environment will be directly accessible on the URL you selected in the New Hosted Service dialog box. Applications published to staging will have an auto generated URL, which you can obtain from the management portal by clicking on the staging deployment and copying the URL from the right hand properties panel.
You use these two environments to test and publish changes to an existing application without taking down the live site. So you typically maintain the current live application in the production environment while you publish and test changes to the staging environment. Once you are happy that the staging environment is ready to go live, you use the Swap VIP option in the management portal to swap over the staging and live deployments. This makes the staging version live with minimal downtime. The Swap VIP button stands for Swap Virtual IPs, so it reroutes traffic to the new app seamlessly without physically moving anything around. You will find the button in the toolbar when you select a service in the main window.
On subsequent deployments, you can speed up the publishing process by deploying direct to Azure from Visual Studio. You do this by selecting Deploy your Cloud Service to Windows Azure in the Publish Cloud Service dialog box:

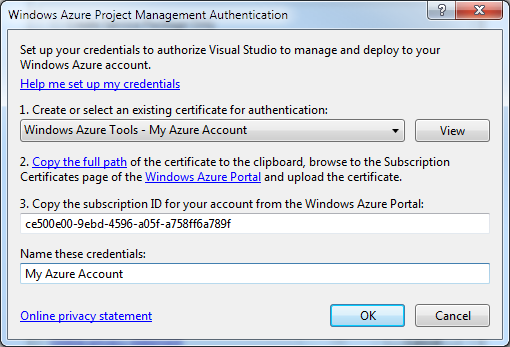
The first time you do this you need to create a credential for your Azure account - select Add… from the Credentials drop down box. This shows the Cloud Service Management Authentication dialog:
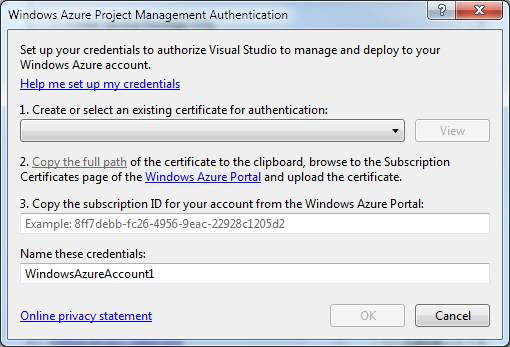
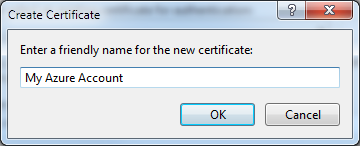
Open the drop down list in step 1 and select Create… to create a new certificate. Enter a friendly name for the certificate in the dialog that pops up – this can be anything so long as it identifies the account you are deploying to. You can reuse the certificate for publishing other services to the same Azure account.
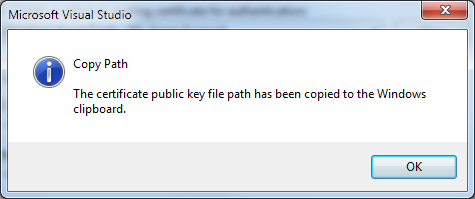
Click the link Copy the full path in step 2. This will copy the certificate path to the clip board, which you will use in the next step to upload the management certificate to Azure.
Then click on the Windows Azure Portal link to open the management portal. Click on the Hosted Services, Storage Accounts & CDN menu option and then select Management Certificates.
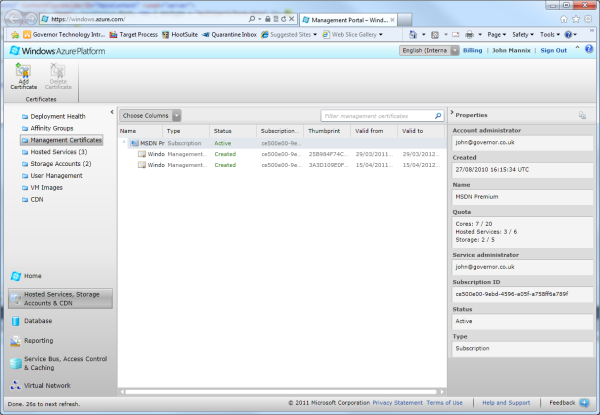
To upload the certificate, click Add Certificate in the toolbar then click Browse… and paste in the full certificate path you copied to the clipboard earlier.
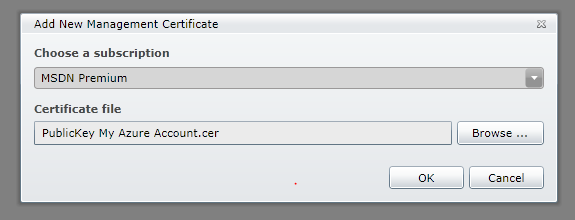
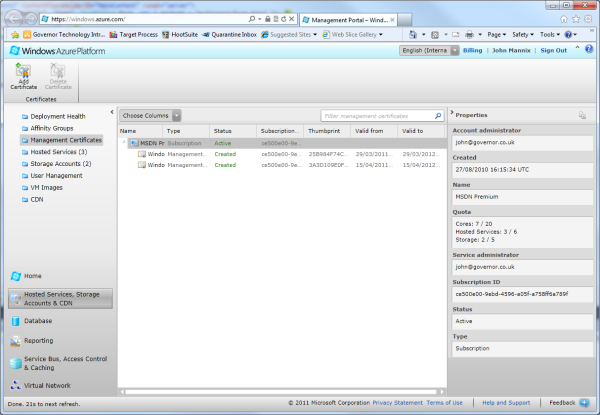
Click OK on the Add New Management Certificate dialog and you should see you certificate added to the list under your subscription.
The final step is to copy your subscription ID from the management portal and paste it back into the dialog box in Visual Studio, which should still be open.
Now you have set up credentials in Visual Studio you can publish direct to your Azure account. You select the credentials you created from the drop down list in the publish dialog box and then select the hosted instance and storage account you want to publish to.

Click OK and the service will be deployed direct to Azure from Visual Studio! You can monitor deployment progress from within Visual Studio in the Windows Azure Activity Log. This should appear when you publish, and lists the current and previous deployments with progress bars and status messages.
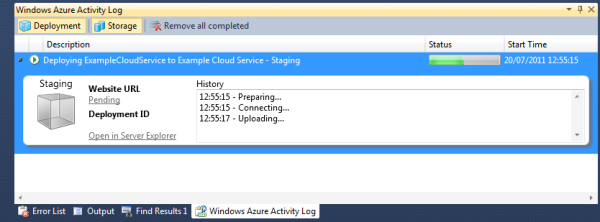
When the publish is complete, the URL of the website will appear in the activity log in place of the Pending link in the screenshot above, and you can click on it here to launch the deployed website in a browser.
Summary
Now that the tools have matured, developing apps for Windows Azure is a pretty painless process, and the benefits in terms of potential scalability, performance and simplicity are very attractive. It particularly suits applications that have spiky demand such as competitions and games where traffic is driven by online marketing campaigns over a relatively short period of time, and applications which require the safety of built in redundancy without the budget to maintain the dedicated infrastructure to achieve it.
We’ve only scratched the surface of development for Azure in this article, but hopefully it gives a feeling for how easy it is to develop cloud hosted apps with Visual Studio, and how you can transfer existing .NET skills to work with the new platform.

Comments