Web development traditionally has been a rather complex activity that involves is a long and painful chain of adding functionality, testing what broke and what works, and hoping that overall progress was made. One key difficulty is working with multiple languages. Take for instance an ordinary ASP.NET application. You have master pages with content place holders and ASPX markup pages that instantiate them, JavaScript content for client-side behavior, CSS and skin files for style and appearance, SQL code for your data definition, stored procedures and custom queries, C# or VB code for your code behind files and XML for configuration, just to mention the main ones.
What if you compose entire web applications in a single language which are then compiled into Javascript and HTML for you with server-side assemblies as required? The concept is not a new one - some, like GWT for Java, enjoy quite a bit of popularity - but has been difficult to implement. The issue is always the need to tweak the generated code after the fact which detracts somewhat from using the framework in the first place.
In this article, we're going to look at using WebSharper, a web development framework for .NET, to build a small web application from scratch that features an HTML5-based clock.
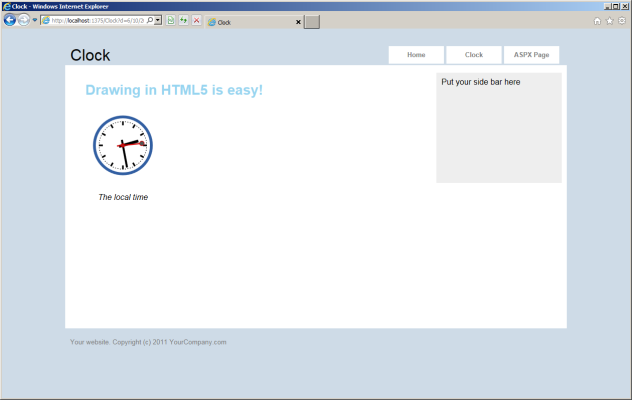
Figure 1. The finished application
The WebSharper team has spent a lot of time addressing the "post-tweak" issue and as you'll see, the framework manages all aspects of your web application, creates all client-side code for you, automates communication between your client and server side, tracks all resources and dependencies and manages them for you automatically. What was accomplished using a multitude of markup, code behind, JavaScript and configuration files before can now be written in a single F# file. Yes, F#.
The current release of WebSharper (2.3.x) comes with a number of Visual Studio templates and full build and deployment automation. Your client-server WebSharper applications can deploy directly into IIS, and those that are purely client-based (HTML5+JavaScript) can be served from any web container or bundled into packages to run on different mobile devices.
Key concepts in a nutshell
Before you jump into developing the sample application in this article, there are a few key WebSharper concepts with which you should be familiar. You can find an in-depth discussion of each in the documentation area of WebSharper website, but here is a brief summary of each:
- Pagelets: the basic building blocks of client-based WebSharper applications. Pagelets correspond to content and/or functionality injected into static markup during the execution of the page. A WebSharper pagelet is an instance of the ordinary System.Web.Control class and can be embedded directly into ASPX markup as well. However, to really benefit from the functional approach, you will use a WebSharper sitelet to expose the pagelets in this article.
- Sitelets: first-class, composable website values in F#. WebSharper sitelets are a powerful abstraction that enable you to define web sites in a concise and declarative style with nothing but F# code. These sitelets in turn can be combined with other sitelets to form larger ones, or enhanced in various ways. For example, as you will see in this article, you can use sitelets to add authentication.
- Formlets: first-class, composable web forms represented as F# values. The WebSharper formlet library comes with various primitives for constructing basic formlets and functions to combine and enhance them. WebSharper formlets can also encode dependencies among inner formlets and implement different rendering styles and user stories such as wizards in a concise and straightforward manner (known as flowlets).
- Templates (aka master pages): WebSharper templates are represented as F# functions with strongly typed placeholders. Out of the box, you can use a Visual Studio item template for adding a page template (ending with .template.xml) to your WebSharper sitelet project. These page templates are ordinary XML files, out of which the build system will distil F# source code that represent your templates.
Getting Started
For the sample in this article to work you must have WebSharper installed. If you don’t yet have it, go and grab the latest version from http://websharper.com/latest/ws2, which at the time of writing this article is 2.3.28. WebSharper works both for Visual Studio 2008 and 2010, but be sure to have F# and Visual Web Developer installed, otherwise most of the WebSharper project templates will not work.
Once installed, open Visual Studio and click File > New Project > Visual F# > Intellifactory. You’ll see all the Websharper project templates available to you, as shown in Figure 2:
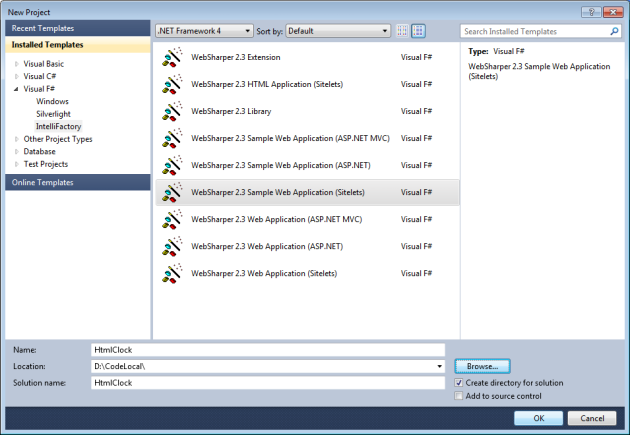
Figure 2 : Websharper project templates in Visual Studio.
For this project, you will use WebSharper 2.3. Sample Web Application (Sitelets) template. Go and give a name and location and click OK to create the initial sample application structure. In your solution explorer you should see two projects with some files created for you, as shown in Figure 3:
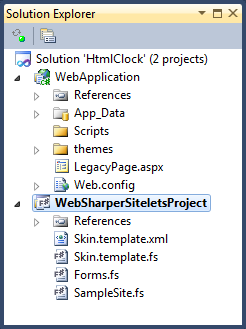
Figure 3 : The Project Structure in Solution Explorer.
The latter project is an F#/WebSharper sitelet project, this contains all the code for your sitelet-based web application. It comes with a sample skin template (these are files ending with .template.xml and always have a corresponding .template.fs file pair generated automatically) and a couple of files that define the functionality for the sample web application. Although this sample is based on this template, feel free to wipe the content of Forms.fs and SampleSite.fs and copy and paste the code from this article instead. Before you do that, you can run your application as a regular ASP.NET application (Ctrl+F5) to see what it looks like, and play with the code to get a feel for it.
Drawing a clock
Go ahead and add a new F# source file to your WebSharper sitelet project, call it Clock.fs, move it right after the template files, and paste the following code in it. Note the use of the JavaScript annotations: these are used to mark functions and members that will run on the client side. WebSharper will analyse your code and generate the necessary JavaScript code files (by default, under the Scripts folder in your web application project) and will automatically include them in your pages as you serve them. First some namespace declarations.
namespace WebSharperSiteletsProject

open System
open IntelliFactory.WebSharper
open IntelliFactory.WebSharper.Html
open IntelliFactory.WebSharper.Html5
Next comes the code responsible for drawing a clock on an HTML5 Canvas element. This is split into two parts: the ClockInternals module contains the Main function that does the actual drawing, and a helper AnimatedCanvas function for embedding it in some HTML markup and asynchronously updating the display every second.
module ClockInternals =

    []
    let AnimatedCanvas draw width height =
        let element = HTML5.Tags.Canvas []
        let canvas  = As element.Dom
        canvas.Width  <- width
        canvas.Height <- height
        let ctx = canvas.GetContext "2d"
        let rec loop =
            async {
                do! Async.Sleep 1000
                do  draw ctx
                return! loop
            }
        draw ctx
        Async.Start loop
        Div [Width (string width); Attr.Style "float:left"] -< [
            Div [Attr.Style "float:center"] -< [
                element
                P [Align "center"] -< [
                    I [Text <| "The local time"]
                ]
            ]
        ]
The drawing code in the Main function uses low-level HTML5 graphics primitives and translates to similar code in the underlying JavaScript version. Have a look in the generated Scripts/WebSharperSiteletsProject.dll.js file to confirm this. Note how you can use the powerful F# asynchronous computations without any extra boilerplate code and how easy it is to construct HTML by using the WebSharper HTML combinators. These are ordinary functions that take a list of attributes or the inner content. If you need to chain the content with the attributes, you can use the -< operator.
    []
    let Main () =
        let clock (ctx: CanvasRenderingContext2D) =
            let now = new EcmaScript.Date()
            ctx.Save()
            ctx.ClearRect(0., 0., 150., 150.)
            ctx.Translate(75., 75.)
            ctx.Scale(0.4, 0.4)
            ctx.Rotate(- Math.PI / 2.)
            ctx.StrokeStyle <- "black"
            ctx.FillStyle <- "white"
            ctx.LineWidth <- 8.
            ctx.Save()

            // Hour marks
            for i in 1..12 do
                ctx.BeginPath()
                ctx.Rotate(Math.PI / 6.)
                ctx.MoveTo(100., 0.)
                ctx.LineTo(120., 0.)
                ctx.Stroke()
            ctx.Restore()

            // Minute marks
            ctx.Save()
            ctx.LineWidth <- 5.
            for i in 0 .. 59 do
                if (i % 5) <> 0 then
                    ctx.BeginPath()
                    ctx.MoveTo(117., 0.)
                    ctx.LineTo(120., 0.)
                    ctx.Stroke()
                ctx.Rotate(System.Math.PI / 30.)
            ctx.Restore()

            let sec = float <| now.GetSeconds()
            let min = float <| now.GetMinutes()
            let hr  =
                let hr = float (now.GetHours())
                if hr >= 12. then hr - 12. else hr
            ctx.FillStyle <- "black"

            // Write Hours
            ctx.Save()
            Math.PI * (hr / 6. + min / 360. + sec / 21600.)
            |> ctx.Rotate
            ctx.LineWidth <- 14.
            ctx.BeginPath()
            ctx.MoveTo(-20., 0.)
            ctx.LineTo(80., 0.)
            ctx.Stroke()
            ctx.Restore()

            // Write Minutes
            ctx.Save()
            ctx.Rotate(Math.PI * (min / 30. + sec / 1800.))
            ctx.LineWidth <- 10.
            ctx.BeginPath()
            ctx.MoveTo(-28., 0.)
            ctx.LineTo(112., 0.)
            ctx.Stroke()
            ctx.Restore()

            // Write Seconds
            ctx.Save()
            ctx.Rotate(sec * Math.PI / 30.)
            ctx.StrokeStyle <- "#D40000"
            ctx.FillStyle <- "#D40000"
            ctx.LineWidth <- 6.
            ctx.BeginPath()
            ctx.MoveTo (-30., 0.)
            ctx.LineTo (83., 0.)
            ctx.Stroke()
            ctx.BeginPath()
            ctx.Arc(0., 0., 10., 0., Math.PI * 2., true)
            ctx.Fill()
            ctx.BeginPath()
            ctx.Arc(95., 0., 10., 0., Math.PI * 2., true)
            ctx.Stroke()
            ctx.FillStyle <- "#555"
            ctx.Arc(0., 0., 3., 0., Math.PI * 2., true)
            ctx.Fill()
            ctx.Restore()

            ctx.BeginPath()
            ctx.LineWidth <- 14.
            ctx.StrokeStyle <- "#325FA2"
            ctx.Arc(0., 0., 142., 0., Math.PI * 2., true)
            ctx.Stroke()
            ctx.Restore()

        Div [
            AnimatedCanvas clock 150 150
            Div [Attr.Style "clear:both"]
        ]
The ClockControl type then exposes this clock as a WebSharper pagelet, so you can embed it in your sitelets or ASPX markup easily later.
type ClockControl() =
    inherit Web.Control()

    []
    override this.Body = ClockInternals.Main () :> _
Composing a Website
Now with the clock functionality implemented, and a ready-to-use template in your project, it’s time to put a sitelet together. Initially, it will have two pages only: a Home page where users land when they arrive at the site and the Clock page where we show the local time as an HTML5 animation. You will represent these aspects as actions that are served from the sitelet and model them as an F# discriminated union with two shapes: Home and Clock.
You should already have an empty SampleSite.fs file in your WebSharper sitelet project. Copy and paste the following content into it:
namespace WebSharperSiteletsProject

open System
open System.IO
open System.Web
open IntelliFactory.WebSharper.Sitelets

/// The website definition.
module Html5ClockSite =
    open IntelliFactory.Html
    open IntelliFactory.WebSharper

    /// Actions that corresponds to the different pages in the site.
    type Action =
        | Home
        | Clock
I have added a couple helper functions and a Template function that uses the Skin template you have in the sitelet project with some customizations like footer and side bar messages.
    /// A helper function to create a hyperlink
    let private ( => ) title href =
        A [HRef href] -< [Text title]

    /// A helper function to create a 'fresh' URL in order
    /// to make sure that browsers don't show a cached version.
    let private RandomizeUrl url =
        url + "?d=" +
            System.Uri.EscapeUriString (System.DateTime.Now.ToString())

    /// A template function that renders a page with some customizations.
    let Template title main : Content =
        let menu (ctx: Context)=
            let ( ! ) x = ctx.Link x
            [
                    "Home"      => !Action.Home
                    "Clock"     => (RandomizeUrl <| !Action.Clock)
                    "ASPX Page" => "/LegacyPage.aspx"
            ]
            |> List.map (fun link ->
                Label [Class "menu-item"] -< [link]
            )
        Templates.Skin.Skin (Some title)
            {
                LoginInfo   = fun ctx -> []
                Banner      = fun ctx -> [H2 [Text title]]
                Menu        = menu
                Main        = main
                Sidebar     = fun ctx -> [Text "Put your side bar here"]
                Footer      = fun ctx -> [Text "Your website.  Copyright (c) 2011 YourCompany.com"]
            }
Armed with this Template function, you can define the content of your two pages in a separate inner Pages module for clarity.
    /// The pages of this website.
    module Pages =

        /// The home page.
        let HomePage : Content =
            Template "Home" <| fun ctx ->
                [
                    H1 [Text "Welcome to our site!"]
                ]

        /// A simple page that shows a clock.
        let ClockPage : Content =
            Template "Clock" <| fun ctx ->
                [
                    H1 [Text "Drawing in HTML5 is easy!"]
                    Div [
                        new ClockControl()
                    ]
                ]
Once these are defined, you can go ahead and create the main sitelet that corresponds to your entire website. This has two parts: first, you create a single-page sitelet for the Home page mapped to the Home action under the root of the application. Second, you create another sitelet that maps each action to its corresponding content page. There are several ways to construct WebSharper sitelets, here you used the most convenient one and inferred the URL space that goes along with the site action type using Sitelet.Infer. This sitelet constructor assigns URLs based on the action type it’s associated with, in your case these will be “/Home” and “/Clock”. Finally, you compose these two sitelets into a single sitelet using Sitelet.Sum.
    /// The sitelet that corresponds to the entire site.
    let EntireSite =
        // A simple sitelet for the home page, available at the root of the application.
        let home =
            Sitelet.Content "/" Action.Home Pages.HomePage

        // An automatically inferred sitelet created for the basic parts of the application.
        let basic =
            Sitelet.Infer <| fun action ->
                match action with
                | Action.Home ->
                    Pages.HomePage
                | Action.Clock ->
                    Pages.ClockPage

        // Compose the above sitelets into a larger one.
        [
            home
            basic
        ]
        |> Sitelet.Sum
The only remaining part is to expose this sitelet value so that it can be served by the sitelet handler in the web application project in your solution. All you need to do is to define a type for it and annotate it on the assembly-level as a WebSharper website.
type Html5ClockWebsite() =
    interface IWebsite with
        member this.Sitelet = Html5ClockSite.EntireSite
        member this.Actions = []

[)>]
do ()
As a side note, your web application project is a standard empty ASP.NET project with a dummy page called LegacyPage.aspx. You referenced this page in your Template function simply to have a feeling about referencing pages the traditional way (via strings) and the WebSharper way (via actions). Note that WebSharper sitelets can have either no manual control (as above, using Sitelet.Infer) or full manual control over the URL space into which they map. Furthermore, sitelets can be combined from smaller ones that use different strategies for defining their URL space. Therefore, it is recommended that you always use safe URLs (via actions) and not strings to reference pages in your sitelets.
At this point, you can boot up your web application and see it run in its full glory (Figure 4):
Figure 4 : The final application.
Summary
In this article, we’ve seen how to build a basic HTML5 application using Websharper and F# Sitelets. In part 2, we’ll see how to extend this simple web application with authentication. We will implement Login/Logout functionality and protect the Clock page with authentication to require users to log in before they can see the local time.
Comments