In part one of this tutorial, we introduced the WebSharper web development framework for .NET and demonstrated how to build a small HTML5-based clock application with it using F#.
So far your application consists of two simple pages that you defined in a few lines of F# code in your Pages inner module. You used the WebSharper templating support to distil F# code for your XML-based design template, and you saw that instantiating this template in F# was easy and type-safe. To see this in action, simply hover over the functions and placeholder types generated for your templates. You can also build various abstractions around these templates; provide custom, partially applied templates for different pages; or simply work with multiple design templates – it’s all very easy to do.
In the second half of this article you will learn how to extend this simple web application with authentication. Basically, you will implement Login/Logout functionality and protect the Clock page with authentication to require users to log in before they can see the local time.
Building a login form
As a first step, you need to build a login form that lets users enter their username and password. This time, reuse the existing empty Forms.fs in your sitelet project, and add the following code to it:
namespace WebSharperSiteletsProject

open IntelliFactory.WebSharper
open IntelliFactory.WebSharper.Formlet
open IntelliFactory.WebSharper.Html
open IntelliFactory.WebSharper.Sitelets
open IntelliFactory.WebSharper.Web

module Forms =

    type LoginInfo =
        {
            Name : string
            Password : string
        }

    []
    let WarningPanel label =
        Formlet.Do {
            let! _ =
                Formlet.OfElement <| fun _ ->
                    Div [Attr.Class "warningPanel"] -< [Text label]
            return! Formlet.Never ()
        }

    []
    let WithLoadingPane (a: Async<'T>) (f: 'T -> Formlet<'U>) : Formlet<'U> =
        let loadingPane =
            Formlet.BuildFormlet <| fun _ ->
                let elem =
                    Div [Attr.Class "loadingPane"]
                let state = new Event>()
                async {
                    let! x = a
                    do state.Trigger (Result.Success x)
                    return ()
                }
                |> Async.Start
                elem, ignore, state.Publish
        Formlet.Replace loadingPane f

    []
    let Redirect (url: string) = ()

    []
    let Login (loginInfo: LoginInfo) =
        System.Threading.Thread.Sleep 1000
        if loginInfo.Password = "password" then
            UserSession.LoginUser loginInfo.Name
            true
        else
            false
        |> async.Return
The main part of this code is the LoginForm function. This takes a URL where a successful login is redirected to, and constructs a WebSharper formlet to take a username/password pair from the user. Upon entering these it displays a loading animation until the login is authenticated (via the Login function, note that it’s a server-side Rpc function by declaration) and responds by redirecting to the given URL or with an error panel if the user could not be authenticated.
[] let LoginForm (redirectUrl: string) : Formlet = let uName = Controls.Input "" |> Validator.IsNotEmpty "Enter Username" |> Enhance.WithValidationIcon |> Enhance.WithTextLabel "Username" let pw = Controls.Password "" |> Validator.IsNotEmpty "Enter Password" |> Enhance.WithValidationIcon |> Enhance.WithTextLabel "Password" let loginF = Formlet.Yield (fun n pw -> {Name=n; Password=pw}) <*> uName <*> pw Formlet.Do { let! uInfo = loginF |> Enhance.WithCustomSubmitAndResetButtons {Enhance.FormButtonConfiguration.Default with Label = Some "Login"} {Enhance.FormButtonConfiguration.Default with Label = Some "Reset"} return! WithLoadingPane (Login uInfo) <| fun loggedIn -> if loggedIn then Redirect redirectUrl Formlet.Return () else WarningPanel "Login failed" } |> Enhance.WithFormContainer /// Exposes the login form so that it can be used in sitelets. type LoginControl(redirectUrl: string) = inherit IntelliFactory.WebSharper.Web.Control () new () = new LoginControl("?") [ ] override this.Body = Forms.LoginForm redirectUrl :> _
A Deeper Look At How Formlets Are Constructed
The key thing to observe in the LoginForm function is the Formlet.Yield chunk. Those two lines compose uName and pw, take their results (two strings), and yield a LoginInfo instance as a new formlet. This formlet is then enhanced with Login/Reset buttons and dressed in a styled formlet container. The inside of the formlet computation expression returns with either a warning or a successful redirection.
The sub formlets in this composition (the username and password fields) are progressively enhanced basic formlets from the WebSharper formlet library. Controls.Input constructs a string formlet modeled as a text box. Similarly, Controls.Password yields a password-style text box. Both of these are enhanced with a validator that refuses to accept empty values, a visual indication of the validation status, and a label. There are further enhancement functions and powerful formlet combinators (such as Formlet.Many and friends) that you should check out, these we won’t discuss here.
Enhancing your site with Login/Logout pages
Now you can turn back to the main sitelet definition again. In your SampleSite.fs file, add the new pages to your action type:
    ...
    type Action =
        | Home
        | Clock
        | Login of option
        | Logout
Here, Login will take an optional action parameter where it will redirect upon successful authentication.
Next, you will need a small widget that shows the current user’s login status – either a Login link or the username with a Logout link. Go ahead and add a nested module before the Template function:
    ...
    module Widgets =

        /// Widget for displaying login status or a link to login.
        let LoginInfo (ctx: Context) =
            let user = UserSession.GetLoggedInUser ()
            [
                (match user with
                    | Some email ->
                        "Log Out (" + email + ")" =>
                            (RandomizeUrl <| ctx.Link Action.Logout)
                    | None ->
                        "Login" => (ctx.Link <| Action.Login None))
            ]

    /// A template function that renders a page with some customizations.
    let Template title main : Content =
    ...
Inside your Template function you can now use this new widget for the LoginInfo placeholder in the site design template instead of the empty content you had earlier:
        ...
        Templates.Skin.Skin (Some title)
            {
                LoginInfo   = Widgets.LoginInfo
        ...
Now add a new page for Login in your Pages module:
    /// The pages of this website.
    module Pages =

        ...

        /// A simple login page.
        let LoginPage (redirectAction: option): Content =
            Template "Login" <| fun ctx ->
                let redirectLink =
                    match redirectAction with
                    | Some action -> action
                    | None        -> Action.Home
                    |> ctx.Link
                [
                    H1 [Text "Login"]
                    P [
                        Text "Login with any username and password='"
                        I [Text "password"]
                        Text "'."
                    ]
                    Div [
                        new LoginControl(redirectLink)
                    ]
                ]
This login page tells the user that they can log in with any username but their password has to be “password”. It also computes the right URL to redirect to, which is either the one passed to the page or the Home page in its absence.
And finally, you modify how you compose your final website by introducing a protected sub-sitelet for the Clock page. Simply replace the original EntireSite value with the following:
    ...
    /// The sitelet that corresponds to the entire site.
    let EntireSite =
        // A simple sitelet for the home page, available at the root of the application.
        let home =
            Sitelet.Content "/" Action.Home Pages.HomePage

        // An automatically inferred sitelet created for the basic parts of the application.
        let basic =
            Sitelet.Infer <| fun action ->
                match action with
                | Action.Home ->
                    Pages.HomePage
                | Action.Login action->
                    Pages.LoginPage action
                | Action.Logout ->
                    // Logout user and redirect to home
                    UserSession.Logout ()
                    Content.Redirect Action.Home
                | Action.Clock ->
                    Content.ServerError

        // A sitelet for the protected content that requires users to log in first.
        let authenticated =
            let filter : Sitelet.Filter =
                {
                    VerifyUser = fun _ -> true
                    LoginRedirect = Some >> Action.Login
                }

            Sitelet.Protect filter <|
                Sitelet.Content "/protected" Action.Clock Pages.ClockPage

        // Compose the above sitelets into a larger one.
        [
            home
            authenticated
            basic
        ]
        |> Sitelet.Sum
This updated version adds the Login and Logout actions to the “basic” sub-sitelet. Note how the Clock action is mapped to a server error (just so that the pattern match is complete). This is intentional, since you map this action in the subsequent code block and will compose/sum “authenticated” into the final sitelet before the “basic” sub-sitelet to ensure that it gets matched hitting the server error mapping.
The authenticated sub-sitelet maps the Clock action to the Clock page and protects it with the Sitelet.Protect function. This sitelet combinator takes a Sitelet.Filter value that operates on the same underlying action type. This filter has further abilities to restrict access in its VerifyUser predicate (here, you simply allow all authenticated users to pass through), and can supply the page to return to if the filter fails (this is the login page as you expected).
Once you put everything together, you can run your new site and navigate to the Clock page. You should see a login screen, enter your username and “password” for the password, and log in:
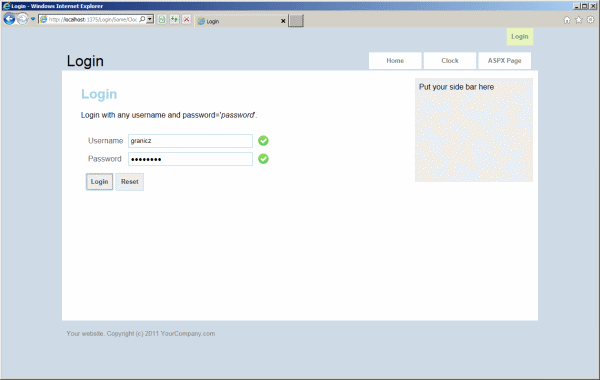
If you typed the right password, you should see the familiar clock page again. Note the login info widget in the upper right corner, correctly identifying you.
Conclusion
In this article, you learned how to add authentication to a WebSharper site by implementing a login form using a WebSharper formlet with waiting animation and a custom authentication function. And finally, you learned how to protect sub-sitelets with your new custom authentication, and composed your sub-sitelets into the final sitelet-based web application.
All your code was in F# and you did not have to write a single line of JavaScript. WebSharper translated your HTML5 asynchronous clock implementation to efficient JavaScript and HTML5 under the hood. As you continue to add further pages to your project, you will enjoy static checking and the compiler will identify any places that need to be adapted in your code as a result.

Comments