Update Sep 22 2012: A revised version of this article can now be found here.
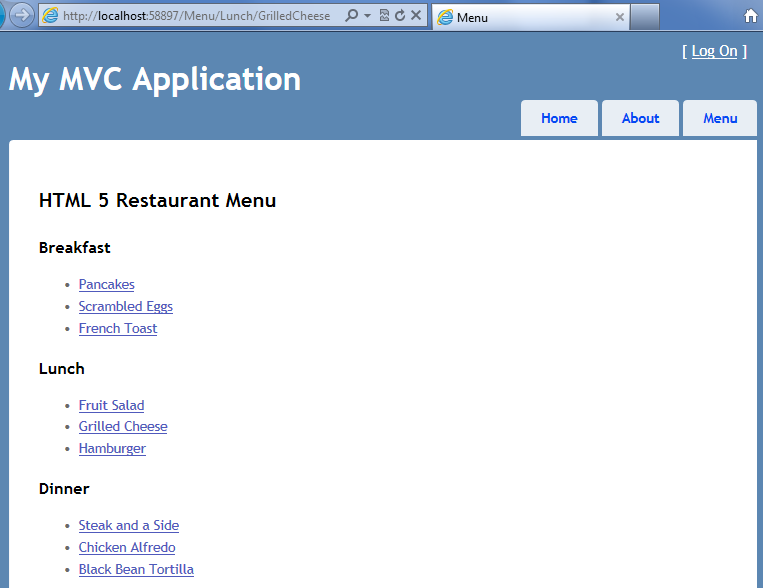
Ed’s Note: This is an extract from the forthcoming book HTML5 for .NET Developers by Jim Jackson II and Ian Gilman. For Source Code, Sample Chapters, the Author Forum and other resources, go to http://www.manning.com/jackson/ The HTML 5 History API is one of the newer kids on the HTML 5 block. It is not as sexy as canvas and not as easily pinned to a specific application requirement like geolocation or local storage but it does have a solid place in your applications. This API will allow you to tame the dreaded Back button in your client’s browser. For that matter, it will also help you get a handle on the Forward button. It does this by giving you control over the URL that your application presents to the world and that it sees internally. Our demonstration application will show one way of getting history integrated with your .NET server-side web applications. We will be making use of the ASP.NET MVC routing and partial view capabilities for the integration. Using these features we can build pages that operate in two modes: These two features combined will give us a gracefully degrading web site that is as responsive as possible and works in any browser scenario. To get started, open Visual Studio and start a new ASP.NET MVC project, an Internet application that uses the Razor View Engine, HTML5 Semantic Markup, and no unit test project. Name the project MenuHistory and then take a look at the resulting project. You should have Account and Home controllers (that we will leave as-is) and views to support them. The first thing we need to do is add a new Images folder to the project. Then, if you want to reduce the physical deployment size of your site, you can remove all the built-in scripts. The server views we will build will use CDN-based scripts, so you will not need them. You can remove the scripts most easily by installing the appropriate NuGet packages. Do this by navigating through the menu system: Tools > Library Package Manager > Manage NuGet Packages. From the dialog that appears, you can remove EntityFramework, jQuery UI, jQuery Validation, and Modernizr. While these are all handy to have, they are unnecessary for our example. You could also remove the jQuery and jQuery Visual Studio IntelliSense, but the IntelliSense handler relies on the base jQuery library and, while you are working in JavaScript with Visual Studio, any help you can get with jQuery is worthwhile. The data for our application could come from anywhere. The point of a model in an MVC application is that it provides a uniform means of abstracting the data storage mechanisms of your application from the business and flow logic. Our demonstration application will be a restaurant menu suitable for a customer’s mobile device. Our model will consist of a menu object that contains a list of menu items. Create a Menu class in the Models folder and assign the properties as shown in listing 1. Listing 1 The Menu and MenuItem model for the history application Using a generic List object to contain our objects makes sense because it can be operated on using Linq expressions to filter and sort. The Key property in MenuItem will be the same as the DishName value except it will not have spaces or special characters. This makes it much friendlier as a routing element in MVC. The basic data that we are using is listed here, but you can fill in whatever data you like. Just keep in mind that the Key string should correspond to a file name in the Images folder of the site. In your Menu object, add a constructor with the following contents: Now using this pattern, fill in the following objects, adding your own DishDescription text as you see fit. Our data model is complete, but how do we get it to do any work in the application? In your solution, right-click the Controllers folder and choose Add > Controller. Name the controller MenuController and use the Empty Controller template. Our Index controller action will return a completely hydrated Menu along with a separate MenuItem object that corresponds to the item the user has selected based on meal and dish parameters. Listing 2 describes the basic code required. Listing 2 Controller action to return a menu and selected item to the view Now, right-click inside the body of your Index method and select Add View. Set the properties in the dialog similar to figure 1. Figure 1 Create a strongly typed view by assigning the model class value. This can be a value populated from the current project’s available objects or you can put in your own type. In the <h2> element at the top of the view, put “HTML 5 Restaurant Menu” and then open a new bit of code in the Razor view so we can set up some local variables. NOTE Styling is performed on the server using the Razor view to ensure a functional server-side page. The styling will be reapplied later using JavaScript during partial view loads. This is duplicated work in a sense but, since the purpose is to provide a complete solution in any browser, the work is necessary. Use the code in listing 3 to set up our variables, add a using statement and change the title of the page. Listing 3 Setting up local variables in a Razor View The variables you assigned in listing 3 will be available for the entire time the View is being processed on the server. Keep this in mind as we build out our view markup. Listing 4 shows what the view needs to display links for each item on the menu. Listing 4 Building markup using Razor If you run the application now, you will receive an error stating that the route named “Menus” could not be found. We need to add a new route to the application, so in your project, double-click the Global.asax file and add the “Menus” route right before the default route is registered. Listing 5 Building the Menus MVC route We created a new route here by tapping into the default RegisterRoutes() method provided by the MVC template. This takes a RouteCollection object that is a property of the application’s RouteTable. The RouteCollection is a list that must contain at least the default route but can contain any number more than that. Routes added to this collection are evaluated by the application in the order in which they are added, and this is a key point to remember, as we will see shortly. Routing in ASP.NET is really nothing more than an advanced pattern matching engine for URLs. When an HTTP request is received by the application, the URL is sent to the routing engine, which parses and evaluates it into a set of parameters that are then matched to controllers, action methods on those controllers, and additional route values that serve as parameters to the action methods. Each route in the application’s route table can have an optional name but requires at least a URL value. The URL is the pattern and can contain literals, parameters (defined using curly braces), and separator characters. If a name is used for a route, it must be unique to the application. Routing is probably the most often misunderstood part of MVC. The frustration the route table causes usually stems from adding routes in the wrong order. The order of the routes matters and here is why. Consider the two routes in listing 6. Listing 6 MVC route selection can sometimes give unexpected results The first route (#1) should be called by using http://site/NewYork while the default route (#2) will be used for all other calls. A request to http://site/ could be expected to use the default route and return the view corresponding to the Home controller’s Index action. The problem is that, because the id value in the Location route has a default value, the first route will always be used and the Maps controller’s GetLocation action will be called. The problem in listing 6 is that the Location route is not specific enough and provides a default value for the location id parameter to be mapped. You can put all the code breakpoints in the world on the Index action in the Home controller and try to figure out why it is not being hit only to discover the routing error after hours of frustrated effort. The Maps controller would be executing the GetLocation action with an empty id parameter. The moral is that the routing scheme you use in your application should be specific enough to handle all expected inbound requests and ordered appropriately to ensure the correct controller gets each request. The second part of the routing system is the ability of MVC to generate a URL inside a view that matches a specific route. There are a couple of methods for this. The most common is the Html.ActionLink() method. This has a number of overloads, but probably the most common is used when building menus and static links to retrieve views. The default master page in the MVC template uses this method to build the tabs at the top of the page. We will use it to add a new Menu item to the tab strip. It is as simple as adding the following line to the unordered list in the Views\Shared\_Layout.cshtml file: The MVC framework is smart enough to understand that you want “Menu” to be the text and to build a link URL that will navigate the page to the Menu controller, Index action. The Html.ActionLink() method is very helpful because it will dynamically use the first route in the application’s route table that matches the parameters sent in. You do not need to worry about the format for the link or what will happen if your routing schema changes. But what happens when the actual URL that is generated? In our sample application, we will be working with the URL on both the client and the server so the format and placement of elements inside the URL is very important. MVC provides a more specific method for dealing with this kind of situation, the Html.RouteLink() method shown in listing 4 will build a URL using the exact route requested, throwing an exception if parameters are not supplied or if the route does not exist. While this is certainly more rigid than ActionLink, it is perfect for situations when a guaranteed URL matching a specific route is required. The application should work now and, if you type /Menu in the URL, you should get something similar to figure 2. Figure 2 The MVC application running with data and building each link using Razor syntax In this article, we covered how to use partial views and custom routes in ASP.NET MVC to build up a page that is responsive and compatible in any browser. The history API may not be the most talked-about API in the HTML 5 arsenal but it deserves attention in any HTML application based on the large benefits in such a small package of features.
The Data Model
namespace MenuHistory.Models
    {
       public class Menu
       {
          public string SelectedMeal { get; set; }
          public List<MenuItem> Items { get; set; }
       }

       public class MenuItem
       {
          public string Key { get; set; }
          public string Meal { get; set; }
          public string DishName { get; set; }
          public string DishDescription { get; set; }
          public bool IsSelected { get; set; }
       }
    }
Data for the model
public Menu()
    {
      Items = new List<MenuItem>();
      Items.Add(new MenuItem()
       {Key="", Meal="", DishName="", DishDescription=""});
    }
Key
Meal
DishName
DishDescripton
Pancakes
Breakfast
Pancakes
…
ScrambledEggs
Breakfast
Scrambled Eggs
…
FrenchToast
Breakfast
French Toast
…
FruitSalad
Lunch
Fruit Salad
…
GrilledCheese
Lunch
Grilled Cheese
…
Hamburger
Lunch
Hamburger
…
Steak
Dinner
Steak
…
ChickenPasta
Dinner
Chicken Pasta
…
Tortilla
Dinner
Black Bean Tortilla
…
Controllers and views
public ActionResult Index(string meal = "", string dish = "")
{
   var menu = new Models.Menu();    			         #A
   menu.SelectedMeal = meal;
   menu.Items
      .Where(s => s.Meal == meal && s.Key == dish)  #B
      .FirstOrDefault() 				               #C
      .isSelected = true;   				            #D
   return View(menu);   				               #E
}
#A The Menu constructor will create the static data we need for the system.
#B Using a generic List object allows us to use lambda expressions to filter data.
#C The FirstOrDefault() method ensures that a single object (or null) will be returned.
#D The returned object’s isSelected property is assigned true.
#E The object we pass to the view will become the model for that view.
@model Menu
@using MenuHistory.Models   			                  #A
@{ ViewBag.Title = "Menu"; }
<h2>HTML 5 Restaurant Menu</h2>
@{
   var selectedItem = Model.Items   		            #B
      .Where(s => s.IsSelected == true)  	      #B
      .FirstOrDefault();    			                  #B
   var selectedDish =   			                     #C
      selectedItem == null ?    		                  #C
      "none" : selectedItem.Key;    		               #C
   List<List<MenuItem>> menuGroups =    	#D
      new List<List<MenuItem>>();   		#D
   menuGroups.Add(  				                     #E
      (from i in Model.Items    		                  #E
      where i.Meal == "Breakfast"   		            #E
      select i).ToList<MenuItem>()    		      #E
   );
   menuGroups.Add(
      (from i in Model.Items
      where i.Meal == "Lunch"
      select i).ToList<MenuItem>()
   );
   menuGroups.Add(
      (from i in Model.Items
      where i.Meal == "Dinner"
      select i).ToList<MenuItem>()
   );
}

#A Assigning a using statement in a view acts the same as a using statement in a C# file.
#B Find the selected item from our Menu.Items list if it exists.
#C Perform a null check to get the selected dish.
#D Create a list of lists variable to let us iterate each meal with minimal code
#E Populate the menuGroups variable for each meal in the model.
<aside class="preview-dish"></aside> 		#A
@foreach (var mealList in menuGroups)   			         #B
{   								                              #B
   var titleClass = Model.SelectedMeal ==   			   #B
      mealList.First().Meal ? "active" : "";    		      #B
   <section class="menu @titleClass"     			      #B
         data-meal="@mealList.First().Meal"> 		   #C
      <h3>@mealList.First().Meal</h3>   		#D
      <ul>
         @foreach (var item in mealList)    			      #E
         {
            var itemClass = selectedDish == item.Key ?  #F
               "selected" : ""; 				            #F
            <li class="menu-item @itemClass"     		#F
                  data-dish="@item.Key"> 			   #F
               @Html.RouteLink( 				            #F
                  item.DishName,    				         #F
                  "Menus",  					            #F
                  new   					                  #F
                  {     					                     #F
                     meal = item.Meal,  			      #F
                     dish = item.Key    			         #F
                  } 						                  #F
               )</li>
         }
      </ul>
   </section>
}

#A The aside element will be filled and styled later with a partial view.
#B We iterate each list of meal items and, based on the first element in the list, set up a style.
#C In each iteration, we also assign a data attribute to each section and later to each dish.
#D The first item in each group will also be used to set up the title element for that list.
#E Each dish in the meal list will then be iterated inside an unordered HTML element.
#F All we need to do is create a list item and fill it with the route data to build a link.
MVC routing
routes.MapRoute(
   "Menus", 				            #A
   "Menu/{meal}/{dish}",    		   #B
   new  				               #C
   {
      controller = "Menu",  		   #D
      action = "Index", 		      #D
      meal = UrlParameter.Optional, #E
      dish = UrlParameter.Optional  #E
   }
);

#A The new route will be called by its name when building routes to ensure proper binding.
#B The pattern used will be /Menu/Breakfast/Pancakes
#C A new defaults object will be added to the route.
#D The default object specifies that the Menu controller and Index action will be used.
#E The meal and dish items are not required so the application should not complain if they are not provided.
MapRoute("Location",
   "{id}",
   new { controller = "Maps", action = "GetLocation", id = "" } #1
);

MapRoute("Default",
   "{controller}/{action}/{id}",
   new { controller = "Home", action = "Index", id = "" }   	#2
);
<li>@Html.ActionLink("Menu", "Index", "Menu")</li>
Summary
The HTML5 History API and ASP.NET MVC
You might also like...
About the author

Dan Maharry 
Dan Maharry is the editor of DeveloperFusion. He has covered the latest in software development since the mid 90s. Not wishing to preach what he doesn't practice, Dan has also worked as a profes...
Interested in writing for us? Find out more.
ASP.NET MVC books
-
20 Recipes for Programming MVC 3: Faster, Smarter Web Development
There's no need to reinvent the wheel every time you run into a problem with ASP.NET's Model-View-Controller (MVC) framework. This concise cookbook provides recipes to help you solve tasks many web developers encounter every day. Each recipe includes...
ASP.NET MVC forum discussion
-
edmonton female escort services near me
by canadapleasure (0 replies)
-
Bagaimana memenangkan $ 1,54 miliar dalam Mega Jutaan
by gametogelan (0 replies)
-
input integer from text file and output text file
by shmilon (0 replies)
-
cSharp stuck at exercise
by xander_Michiels (0 replies)
-
Need help in selected the Tax Audit Year from drop down menu and displaying results for the selected year
by citymumbai (0 replies)
ASP.NET MVC podcasts
-
.NET Rocks: Jeff Fritz Knows One ASP.NET
Published 7 years ago, running time 0h54m
Carl and Richard talk to Jeff Fritz about how ASP.NET has evolved over the years. Jeff talks about the continued dominance of web forms in relation to MVC and how the different libraries can be used together. In fact, there's ONE ASP.NET, and everything: web forms, MVC, Web API, SignalR, all work.
ASP.NET MVC jobs
-
.NET Web Developer at FinTech Startup (with traction)
FundApps in London, United Kingdom
Negotiable -
.NET Developer
sti-professionalservices in Detroit, United States
FOR ALL POSITIONS COMPENSATION IS NEGOTIABLE -
Web Developer at Growing Startup
FundApps in London, United Kingdom
-
Senior Software Engineers
LexisNexis in Cary, United States
Comments