While people have been talking about Web 2.0, the Windows Live platform has been steadily growing and maturing. A recently-announced Windows Live development targets this need for a joined-up web experience. Windows Live Data is a service that allows users to share their data with web applications. What data exactly? Well, for now we can expose the user’s Windows Live Contacts, but expect more and more Windows Live services to share data in this way.
Of course, sharing data between web applications means that we need to give consideration to matters of security and privacy. Windows Live Data puts the user in control, as we’ll see.
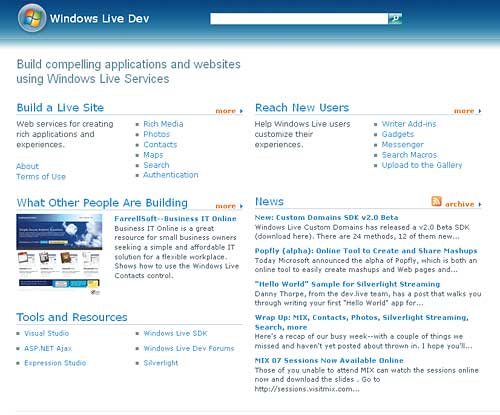
Online guidance for Windows Live development
Windows Live Contacts API
The Windows Live Contacts API is the first example of a service that uses Windows Live Data. In this article I’ll explain what it does and how to use it, but remember that ultimately this mechanism is about more than just contacts. Windows Live Data introduces a new uniform URI scheme that is used for accessing a user’s data. Here’s an example:https://cumulus.services.live.com/ [email protected]/LiveContactsAn application could use this URI to access all of the contacts data held by the Windows Live Contacts service on behalf of the user with the Windows Live ID [email protected]. If the application wants just a specific piece of data, rather than the whole set, a more specific URI can be used:
https://cumulus.services.live.com/ [email protected]/LiveContacts/ Contacts/Contact(3)This example would retrieve only the data relating to contact number 3. The URI can be even longer, to retrieve just a specific subset of the data relating to this particular contact.
In these examples I’ve used a Windows Live ID to identify the user in the middle of the URI. Technically this part of the URI is known as the handle, and in time it will be possible to specify the user via alternative mechanisms, not only with a Live ID.
So as you can see, accessing the data is simple. But we can’t allow just any web application to access our contact details. Windows Live Data provides a security infrastructure around our data, and it’s this that we’ll look at next.
Security Considerations
The data that a user keeps in a Windows Live service is regarded as that user’s property. The user must be in full control of which applications can access which data, and so Windows Live Data provides the necessary user experiences around the permission-granting and revocation operations.Granting Permissions
Before an application can access a user’s data, the user must grant permission to that application. The application should explain that this is necessary, and why, and provide a link to the permission-granting page at Windows Live. The link is formed like this:https://ux.cumulus.services.live.com/ pgux/default.aspx? rl=https://myapplication/ permission-return-page& pl=https://myapplication/ privacy-statement-page& ps=LiveContacts.ReadOnlyThose query-string parameters need some explanation:
- rl points to a page inside the application that Windows Live can redirect the browser to after the permission-granting user-experience has been completed. Values are posted to this page to indicate the outcome of the permission-granting process:
- Was permission granted?
- An authentication token if necessary for accessing the data
- pl points to a page inside the application that should set out the privacy statement for the application. Within the permission-granting process, the Windows Live content encourages the user to follow a link to this page before deciding whether to trust the application.
- ps indicates the level of data access requested by the application. In this example, the application is requesting read-only access to the Windows Live Contacts data. It could also request read/write access, and in time other types of data will be available for use too.
- Sign in with their Windows Live ID (omitted if they’re already signed in)
- They can read some information about the implications of sharing data, and are invited to view the application’s privacy statement.
- If they’re happy, they click a button to grant the permission.
Viewing and Revoking Permissions
Any application that uses Windows Live Data should provide a link so that users can easily navigate to the permission revocation pages in Windows Live. Of course, the user could also set up a favourite. The URL is:https://ux.cumulus.services.live.com/ prux/default.aspxOnce the user has signed in with their Live ID, this page will list the applications to which they have granted permissions. For each application it tells the user which data is available to the application, and what level of access the application has. To revoke permissions, the user selects check-boxes next to the applications that are to be removed, and then clicks Revoke.
Authentication options
An application that has permission can access the user’s data using the RESTful API described earlier, but must supply some kind of authentication token so that Windows Live Data can check its permissions. Three different authentication schemes are currently provided for:- Domain Authentication, where the application must set up the HTTP Authorization header to contain the token provided by the permission-granting user experience pages. Example code for this approach is shown below.
- Mutual SSL Authentication. If the application uses an SSL certificate that is valid for client authentication as well as server authentication, it will not need to supply a domain authentication token when requesting data.
- RPS (Relying Party Suite) Authentication. This is primarily intended for smart-client applications. See MSDN documentation for information about how Windows and non-Windows applications can obtain this kind of security token, and then present it in the HTTP Authorization header when accessing data.
Sample Code
As described earlier, the permission-granting user experience will post certain values to a web application, including a domain authentication token if permission was indeed granted. In general an application will store that token in a database, keyed against the logged-in user. Remember that the token is valid indefinitely. Once in possession of the token, the application can create an HTTP request on the server to access the user’s data, as in this example C# code from an ASP.NET application:// Create HTTP request UriBuilder urib = new UriBuilder(); urib.Scheme = “HTTPS”; urib.Path = “/” + _ownerHandle + “/LiveContacts”; urib.Host = “cumulus.services.live.com”; urib.Port = 443; HttpWebRequest req = (HttpWebRequest) WebRequest.Create(urib.Uri); // Add authorization header string authHeader = “DomainAuthToken at=\”” + _domainAuthenticationToken + “\””; req.Headers.Add(“Authorization”, authHeader ); // Get xml contacts data into xml dom HttpWebResponse resp = (HttpWebResponse)req.GetResponse(); XmlDocument doc = new XmlDocument(); doc.Load(resp.GetResponseStream()); resp.Close();Alternatively, the authentication token could be sent down to the user’s browser so that client-side script can make the HTTP request. This is subject to security settings in the browser, and you should remember to use an encrypted channel, as in HTTPS, to pull the token down to the client. The following Javascript illustrates how to access Windows Live Data from the client; it assumes elements called authToken and ownerHandle exist and have been populated by the server with the authentication token and the handle of the user that owns the data.
??Javascript:
function mapLoaded()
{
var authToken = document.getElementById(
“authToken”).value;
var ownerHandle = document.getElementById(
“ownerHandle”).value;
request = new XMLHttpRequest();
var authHeader = “DomainAuthToken at=\””
+ authToken + “\””;
var uri = “https://cumulus.services.live.com/”
+ ownerHandle + “/LiveContacts”;
request.open(“GET”, uri);
request.setRequestHeader(
“Authorization”, authHeader);
request.onreadystatechange = gotData;
request.send(null);
}
XML Data Format
The XML data returned from the Windows Live Contacts API is described by an XML schema. Full details can be found in MSDN online. A GET request to the following URI:https://cumulus.services.live.com/ [email protected]/LiveContacts…will return the entire contacts data for user [email protected]. It might look something like this:
<LiveContacts> <Owner> <WindowsLiveID> [email protected]</WindowsLiveID> </Owner> <Contacts> <Contact> <ID>e7d194c4-8f7b-43a7-bc9c- 0e710891832f </ID> <AutoUpdateEnabled>false </AutoUpdateEnabled> <Profiles> <Personal> <FirstName>Sherlock</FirstName> <LastName>Holmes</LastName> </Personal> </Profiles> <Emails> <Email> <ID>2</ID> <EmailType>Personal</EmailType> <Address>[email protected] </Address> <IsIMEnabled>false</IsIMEnabled> <IsDefault>false</IsDefault> </Email> </Emails> <Locations> <Location> <ID>1</ID> <LocationType>Personal</LocationType> <PostalCode>NW1 6XE</PostalCode> <IsDefault>True</IsDefault> </Location> </Locations> </Contact> <Contact> ... repeat for each contact </Contact> </Contacts> </LiveContacts>
Modifying the Data
The simplest form of interaction with the API is to use the HTTP GET verb, as shown in the code samples above. Unless the application has been granted the LiveContacts.ReadWrite permission, GET is all it can do. The real power of Windows Live Data is that it isn’t just read-only. Allowing applications to modify a user’s data is a key part of creating that “joined-up” experience on the web. Let’s take a look at how an application can make changes in the user’s contacts data.Inserting New Data
Whether creating a new contact, or adding new data to an existing contact, such as an additional email address, we use the HTTP POST verb. The body of the request contains the new data in XML form. For example, if we take this XML:<Email> <EmailType>Business<EmailType> <IsDefault>True</IsDefault> <Address>[email protected] </Address> </Email>…and we POST it to this URI:
https://cumulus.services.live.com/ [email protected]/LiveContacts/ Contacts/Contact(3)…this will add a new email address to the contact, belonging to the user [email protected], with ID 3.
Modifying Existing Data
An application can change some values in existing data and leave surrounding data intact. To do this, use the HTTP PUT verb. For example, taking this URI:https://cumulus.services.live.com/ [email protected]/LiveContacts/Owner…and sending this XML:
<Owner>
	<FirstName>Martin</FirstName>
</Owner>
…will change the data owner’s First Name to Martin, leaving all other data under the Owner element intact.
Deleting Data
Applications can use the HTTP DELETE verb to delete all data that’s identified by a given URI. For example:https://cumulus.services.live.com/ [email protected]/LiveContacts/ Contacts/Contact(3)…could be used to delete the entire contact record for the contact with ID 3.
To remove only certain data values within a specific URI, the HTTP PUT verb should be used instead. If the example given earlier were modified to use this XML:
<Owner><FirstName></FirstName></Owner>…it would have the effect of deleting the First Name value for [email protected].
Summary
Mashups that reuse visual elements of different web applications are great, but “mix-and-match” at that level is just the tip of the iceberg. Taking the Internet to the next level means building web applications that can co-operate at a deeper level. Users want to keep their data in one place, but use it everywhere, while remaining in control of who gets to access that data. Windows Live Data makes that level of integration a reality. The best starting point for all Windows Live development is dev.live.com.Remember, Contacts is just the beginning. Windows Live Data defines a uniform URI scheme that can be extended to any kind of data that users might want to work with. Building on the capabilities of Windows Live Data, I believe that Windows Live will rapidly establish itself as the application platform for the Internet.
Martin Parry is a Developer Evangelist at Microsoft. For seven years he has helped developers to adopt Microsoft’s newest technologies. Contact him at [email protected] and check out his blog.
Comments